I know I have been remiss in my updates and general posting activity but between basement flooding, more deaths in the family, summer vacation, bathroom remodeling and kids going off to college ... it's been a busy summer. Besides, my oldest daughter got me all into Skyrim (the video game) and so I am always having to beat back that distraction.
Skyrim ... distraction factory.
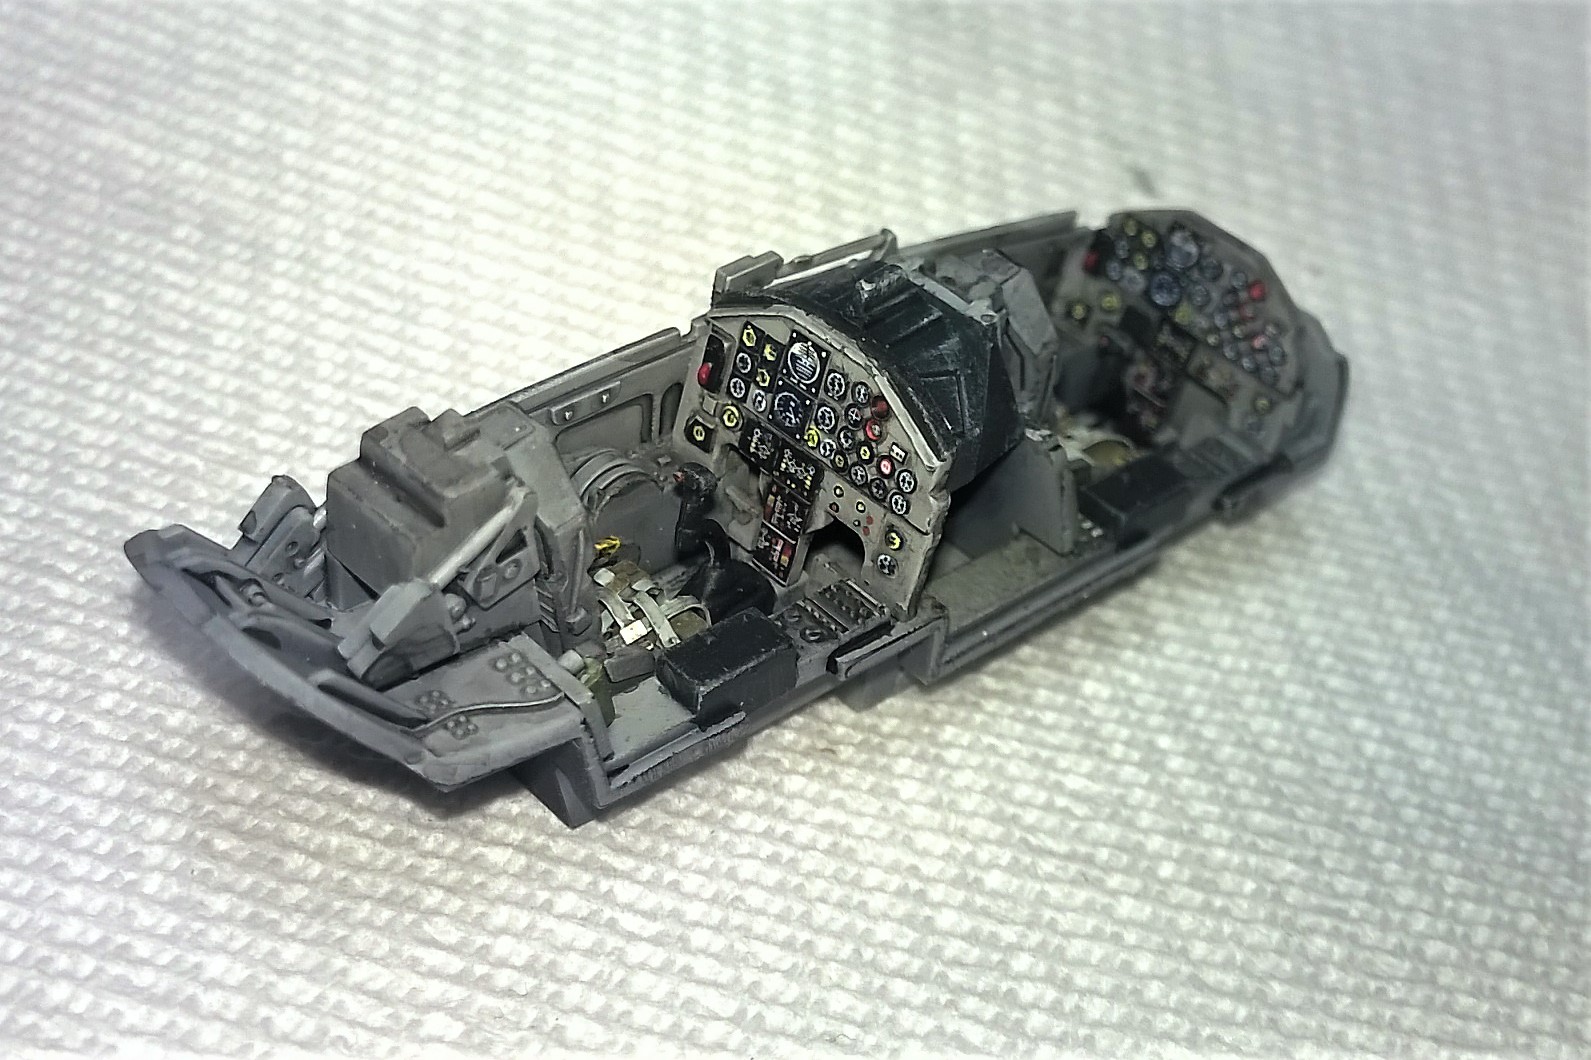
Since this blog has no followers though, you can imagine that my concern is pretty low. Perfect ... Not disappointing anyone today. Anyway ... I digress. Despite my long pause I have been making progress on the Trumpeter T-38A Talon "Principal Project". I had actually finished the cockpit several months ago. I must have mis-aligned when putting it in the fuselage however. The sides seemed to bow outward, leaving a considerable gap on either side of the coaming. Anyway that was enough to derail me for a several months. In the interim I took some really crappy photos with my phone of the cockpit fully painted and assembled (but not in the fuselage) and thought I would share them here. The instrument panel decals actually turned out pretty nice. In the forward seat I attempted to put them on as a single decal, and it turned out OK, but for the back seat I carefully separated the decals into smaller sections using my Exacto and everything lined up much more nicely. Micro-Sol really helped snug the decals into the details of the instrument panel and I was pleased with the results.
Cockpit Detail before wash and weathering applied. I tried to add "scuff" marks to the floor but it turned out looking like what it was ... someone scratching at the paint with a sharp tool. I'll have to figure out another way to do this convincingly.
This was also my first time working with PE (photoetch) and was encouraged with my progress. While I placed and configured the seat belts in all the wrong places, I suspect that unless you've ever strapped into one of these yourself, you probably wouldn't know the difference. The interior was painted largely in gull gray with a wash of Nato black (I think that's what it was). Combined with dry-brushing gull-gray I was pleased with the results. Of course, according to what I hear on forums and various online resources, these are fairly "old-school" and basic techniques, designed to make the inexperienced modeler feel better about their inexperience ... IT WORKED ... I loved the results!! :)
Rear Cockpit Detail - wash applied and PE in place.
Well ... I have started assembling the remainder of the aircraft. A fair amount of putty on the seams which makes me nervous as I am afraid of losing the fantastic detail included on the model. I am using tape to limit the impact of the putty and purchased dental picks to help me replace any lost panel lines ... I HATE SCRIBING ... so we'll see how that goes. If you're waiting for the next installment, I'd be shocked as no one even knows this blog exists! Regardless it will be here when my time and motivation converge. See you then.
If you've read my page on my "Principal Projects" you'll understand the importance of these special projects as compared to others I work on. If you don't know what I mean. please read my page on Principal Projects for details.
Today I want to begin to document one of those projects ... the T-38A Talon. Perhaps I should start with the T-37 Tweet, as my father did, but the T-37 involves natural metal finishes which I do not think I am prepared for yet, so I am starting with the T-38 instead.
From my father's memoirs ...
In July of 1963 my father, then 2nd Lt. Thomas Stenstrom and newly wed the week before, returned to his Squadron, the 3501st Pilot Training Squadron at Reese AFB, Lubbock, TX, from 4th of July break to begin Primary Pilot Training.
"Ours was the first flight in the squadron to fly the Northrop T-38 Talon instead of the old T-33 Shooting Star. The planes were brand new, right out of the factory and had that 'new car' smell. The plane was supersonic and looked like it was moving even when it was parked".
My Father standing next to one of the brand new T-38A Talon trainers.
The project
So my project is to reproduce the T-38 pictured in the photo above. The tail number of 23647 indicates that the funding for the plane was approved in 1962 and the fact that the photo was taken in 1963 would suggest that this was very likely the aircraft's first assignment. Therefor at the time my father encountered it, it would have been a brand new plane. This means that any heavy weathering would be inappropriate. Other than that, I do not know much about the history of the plane. From a search on the tail number I was able to discover that it was that it was ultimately transferred to the "Turkish AF as 23647", although I don't know when it was sold or what it was doing before then,
Some of the first kits I built, as I was realizing that building model kits was not as easy as all these videos make it look, were of T-38's. Inexpensive MiniCraft Hasegawa and Starfix kits became my lab rats. VERY basic and simple kits, the molds dated back to the 60's. Raised panel lines and absolutely ZERO cockpit detail was only the beginning of the challenges that they presented.
After conducting a little research I discovered that these were actually F-5B Freedom Fighters, and while based on the same air frame, possessed some minor differences, including wheel nose hub diameter, drag chute, air intakes, and inner forward wing root. Since I was just beginning I was not in any position to attempt modifying a kit. So I built a couple of these as test projects.
Starfix T-38 Talon build results w/ custom decals on Testors paper and minor mods to the wings.
I was not happy, but satisfied enough with these results, given my (lack of) experience. Most importantly I learned some lessons and had the opportunity to hone some skills. I even managed to successfully-ish execute some minor modifications.
Other efforts include a PM Model F-5B Freedom Fighter conversion to an T-38. These kits however, make even the fore-mentioned Hasegawa kits look like a contemporary Tamiya kit. Originally purchased for about $5.00 USD, however, I felt comfortable chopping and hacking this one up in an effort to working on scratch building and conversion skills and the ever important panel lining skill set.
PM F-5B Freedom Fighter model kit.
Panel line practice on the PM F-5B kit. I need more practice.
Aside: At the time I originally wrote this post (March 2017) I am seeing these kits being sold for $20 and up, which, in my opinion, is an insult. Even done well you can get much better kits for the same money. These kits are, at the $5 USD I paid, great for practice kits and mules you can use to experiment with and practice scratch built features. For $20 and more however, these are not kits you purchase to beat up and throw away (at least not on my budget). The amount of effort that would have to put into the build in order to get the value out of it is not worth it; not when you could spend the same money and get considerably nicer kits. It's my opinion that they can do this because there just isn't a selection of T-38 kits available right now. These kits aren't even genuine T-38's. This vacuum is being exploited and people are being gouged for these exceptionally sub-par kits. They are "vintage" but they aren't even that rare as they seem to be overpriced and everywhere.
Anyway, over the ensuing months I have also built several F-15's. F-14's and MiG-29's accumulating model building tools and supplies and further sharpening my skills. I think I have finally arrived at a place where I am comfortable enough that I am going to take a stab at a "real" T-38 kit.
Despite my efforts to keep everything in scale with my father's 1:72 scale C-130 Hercules I will be doing, there are no 1:72 scale T-38 kits on the market. It seems Sword had made a really nice one but I can't find it anywhere (if anyone knows where I can pick one up please let me know!). I do have a ERTL F-5B Freedom Fighter in 1:72 that, when I become comfortable enough with my ability to modify it, I will build as a T-38. It is nicely detailed but this is another kit I cannot find anymore of. This likely means I will only get one shot at it ... so until I am absolutely confident it will remain in my stash.
In the meantime I have conceded that in order to build a kit designed to be an actual T-38, I will have to up the scale to 1:48. Thus I have purchased the Trumpeter 1:48 T-38A Talon. This will become my first real swing at one of my principal projects.
1:48 Scale Trumpeter T-38A Talon
Kit Reviews and References
Much to my surprise there are not a lot of videos published on this kit. I have put together what I could find though. I suppose the T-38A is jut not that popular of a subject.