I know I have been remiss in my updates and general posting activity but between basement flooding, more deaths in the family, summer vacation, bathroom remodeling and kids going off to college ... it's been a busy summer. Besides, my oldest daughter got me all into Skyrim (the video game) and so I am always having to beat back that distraction.
 |
| Skyrim ... distraction factory. |
Anyway ... I digress.
Despite my long pause I have been making progress on the Trumpeter T-38A Talon "Principal Project". I had actually finished the cockpit several months ago. I must have mis-aligned when putting it in the fuselage however. The sides seemed to bow outward, leaving a considerable gap on either side of the coaming. Anyway that was enough to derail me for a several months. In the interim I took some really crappy photos with my phone of the cockpit fully painted and assembled (but not in the fuselage) and thought I would share them here.
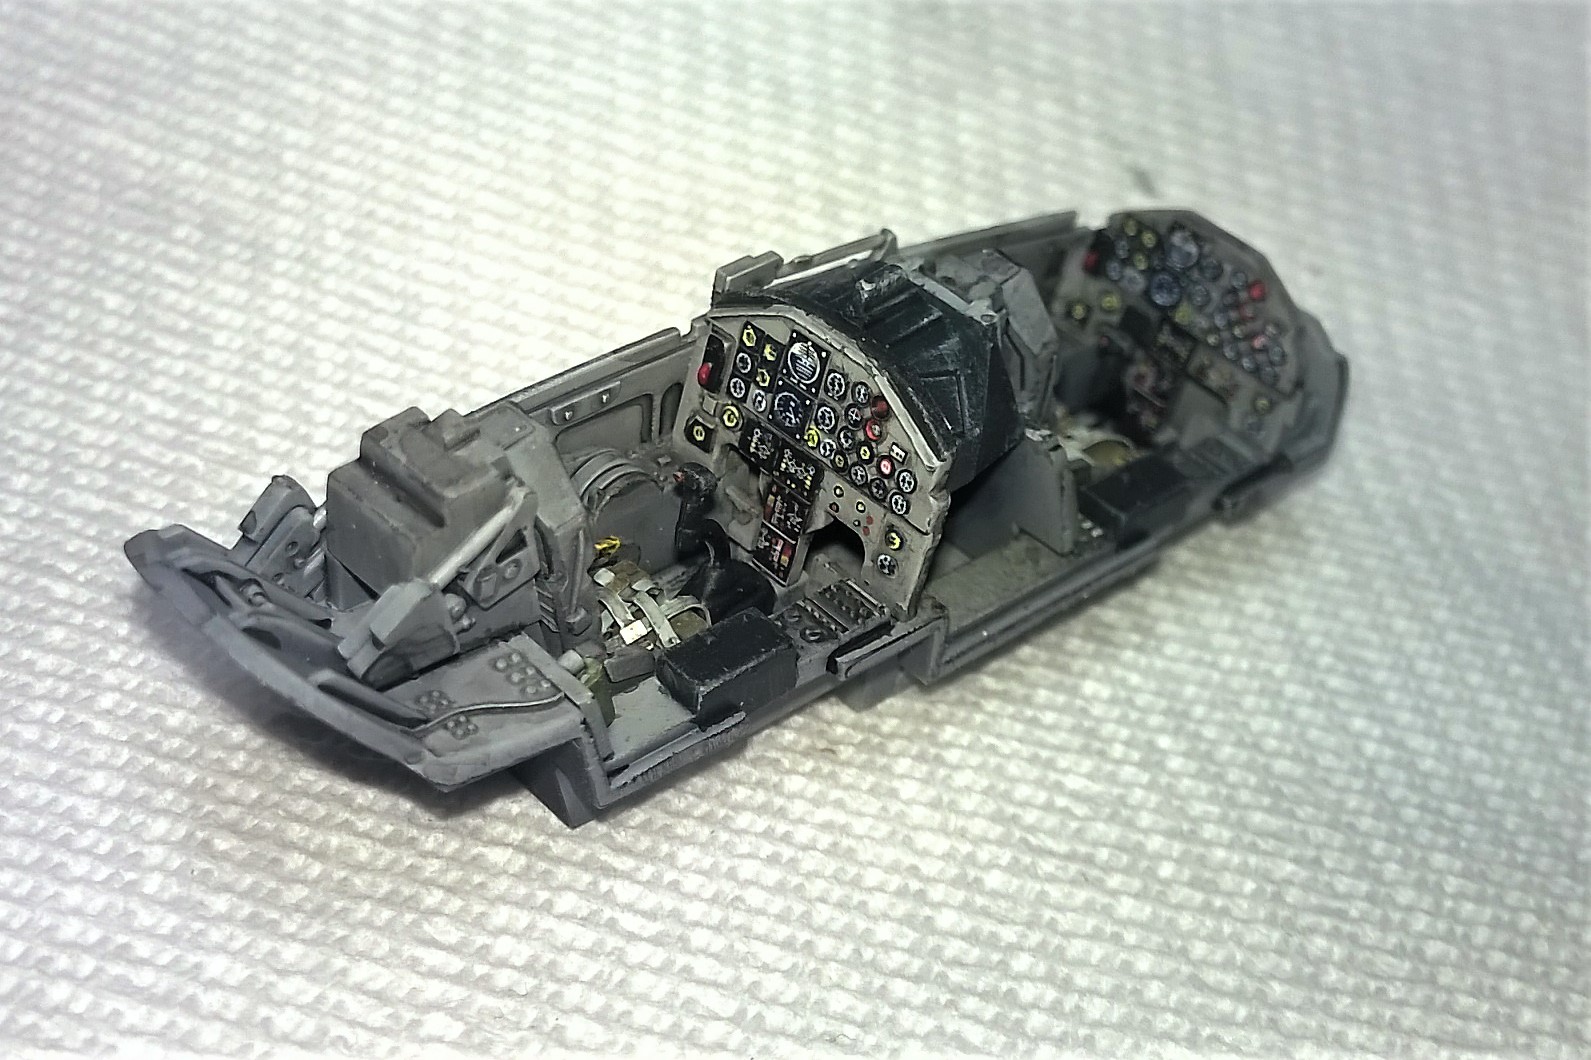
The instrument panel decals actually turned out pretty nice. In the forward seat I attempted to put them on as a single decal, and it turned out OK, but for the back seat I carefully separated the decals into smaller sections using my Exacto and everything lined up much more nicely. Micro-Sol really helped snug the decals into the details of the instrument panel and I was pleased with the results.


 |
| Cockpit Detail before wash and weathering applied. I tried to add "scuff" marks to the floor but it turned out looking like what it was ... someone scratching at the paint with a sharp tool. I'll have to figure out another way to do this convincingly. |
This was also my first time working with PE (photoetch) and was encouraged with my progress. While I placed and configured the seat belts in all the wrong places, I suspect that unless you've ever strapped into one of these yourself, you probably wouldn't know the difference.
The interior was painted largely in gull gray with a wash of Nato black (I think that's what it was). Combined with dry-brushing gull-gray I was pleased with the results. Of course, according to what I hear on forums and various online resources, these are fairly "old-school" and basic techniques, designed to make the inexperienced modeler feel better about their inexperience ... IT WORKED ... I loved the results!! :)


 |
| Rear Cockpit Detail - wash applied and PE in place. |
Well ... I have started assembling the remainder of the aircraft. A fair amount of putty on the seams which makes me nervous as I am afraid of losing the fantastic detail included on the model. I am using tape to limit the impact of the putty and purchased dental picks to help me replace any lost panel lines ... I HATE SCRIBING ... so we'll see how that goes.
If you're waiting for the next installment, I'd be shocked as no one even knows this blog exists! Regardless it will be here when my time and motivation converge.
See you then.
No comments:
Post a Comment