Forward
Ever complete a model but forget everything you did? So, when it came time to recreate a color or technique you couldn't remember how to do it? This happens to me ALL THE TIME. So I figured I would try something a little new for me. Gonna try and do a build log.Due to a cross country move, I have been unable to work on anything for over a year. I have recently gotten my model "studio" (garage) set up and now have the chance to get started working on projects again. After more than a year I figure some skills and habits have atrophied so I want to pick a project to use as a "refresher". An inexpensive kit that I could exercise some old and try out some new techniques on.
That being said, a year or so ago I added a few inexpensive Revell model kits to my stash; the 1:48 P-50B Tiger Shark and 1:48 Spitfire Mk. II. These kits are "basic" in that they don't have many parts and are low on detail. A WWII kit seemed a perfect subject to start with, since mistakes may be more easily masked with heavier weathering more common on WWI aircraft than more modern jets.
The Project
As I had done a "not-so-successful" build of this Spitfire in the past I decided I would give the P-40B a shot. So that's what I'll be working on in this build.
"Rules"
I must work with what I have
No new tools, paints, after market add-ons and such. I cannot spend any more money on this project. That being said, after six years or modelling I do have quite a bit of paint and equipment already, so as hardships go this won't be too big of a deal.
Don't mix paint colors
I am lousy with color matching. I don't really believe in the notion of "accurate" colors anyway, since after you apply the "true" color you end up apply weathering, filters, etc. which changes the color anyway. So for this project I won't get too hung up on "accurate" colors. I will look for colors in my color rack that closely resemble the desired color without having to mix color. Out Of the Bottle painting only!
Historical Accuracy be Damned.
I love a well-researched build. A model with a story behind it is of course, a more compelling subject. For this build, however I will not be sweating the historical accuracy of the markings or colors/version too much.
Is the instrument panel correct for this variation of the plane? Is the paint scheme appropriate to the version? Are the markings suited to the paint scheme? Are they historically correct?
The answer to all these questions will be ... "I don't know", "I don't care". This project is about getting my "mojo " back (yeeeah Baby!) and refreshing my skills. Decisions will be made on what I think looks cool and feels authentic, not necessarily accurate.
The Goal
At the end of the day my goal is to get back into form, get comfortable with building again and hopefully learn some new skills. To that end, the result I am looking for should bear resemblance to one of the following...
I have always loved the desert paint schemes, and the decals that came with the model should aesthetically, if not historically, satisfy either of these schemes. The reds and blues on the decals are darker than in this illustration, so I may end up attempting to paint them instead of using decals ... we'll see.
The Kit
I figure the best place to start is with a quick view of the kit. I won't get into a whole review here but will jot down a couple of things that jumped out at me that may be of interest down the road.
- Decent exterior panels and rivet details, however ...
- Raised panel lines!! (How barbaric)
- Thin, brittle-feeling plastic.
- A few tricky ejection pin marks.
- How do we get rid of them whilst retaining the raised detail? Can we?
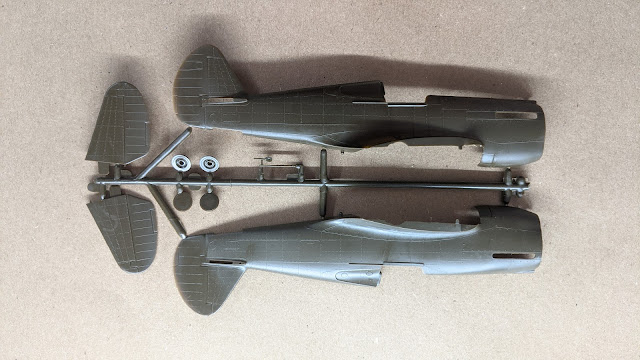
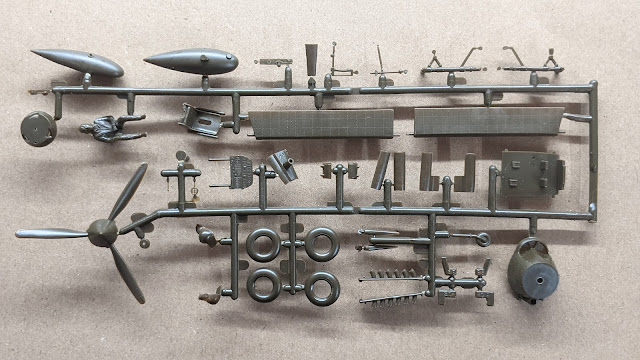
Here are some photos of the kit, the instruction sheet and decals.
Photos
 |
| Exterior detail is actually pretty nice. All raised, however. Hopefully I can keep it! |
 |
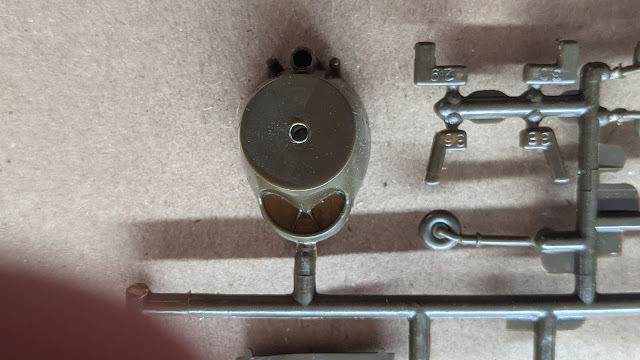
| Nasty ejection pins and not much detail |
 |
| Ejection pins smack in the middle of the detail! How do I repair raised rivets!!?? |
 |
| Why can't they just put their branding on the INSIDE of the mold instead of making me have to sand it away!! It should be clear of the raised details however so ... no big deal I guess. |
 |
| P-40B ... Is this the right instrument panel? I've seen others that look more like a A6M Zero. |
 |
| Thinking about how I can add more detail to the intake. Hmmmm... |
 |
| Nice little pilot fella. Not bad. |

|
| No instrument panel decal! I gotta paint that detail!? My dry brushing is not THAT good. We'll see how it goes I guess. |
 |
| Gonna be in flight so closed cockpit it is!! Not bad plastic here either. |
References
So a couple of sources I am using for references. Not an exhaustive list for sure but some inspiration.
- Scalespot
- Build Log : "Curtiss Mk.IIB Tomahawk (P-40C)- Build Review"
- Chris Wauchop
- Build Log : "Hasegawa 1/32 P-40E Warhawk (made as a Kittyhawk Mk.1a)"
- Scale Model Videos (Pinterest)
- Includes boards for P-40 references
- Scale Model Videos (You Tube) : P-40 Documentaries
- Playlist of various P-40 YouTube documentaries
- Scale Model Videos (You Tube) : P-40 Model Builds
- Playlist of various P-40 YouTube builds
- Tripod.com
- Walk around photos
- LargeScalePlanes.com
- Forum thread. You might need to hunt around, but there's lots of great photos and references. Read the conversation too! Lot's of great information.
Final Thoughts
I find it curious that this box is titled/labeled "Tiger Shark". As I understand it the only named designations for the P-40 were ...
- Warhawk
- Tomahawk
- Kittyhawk
While I know that the plane was made popular through it's use by the "Flying Tigers" early in the war in the defense of China, but was the plane ever referred to as a "Tiger Shark"? If you know, drop a comment!


No comments:
Post a Comment